Click the Self Help button to use the Cash Practice® walkthrough when logged into your account

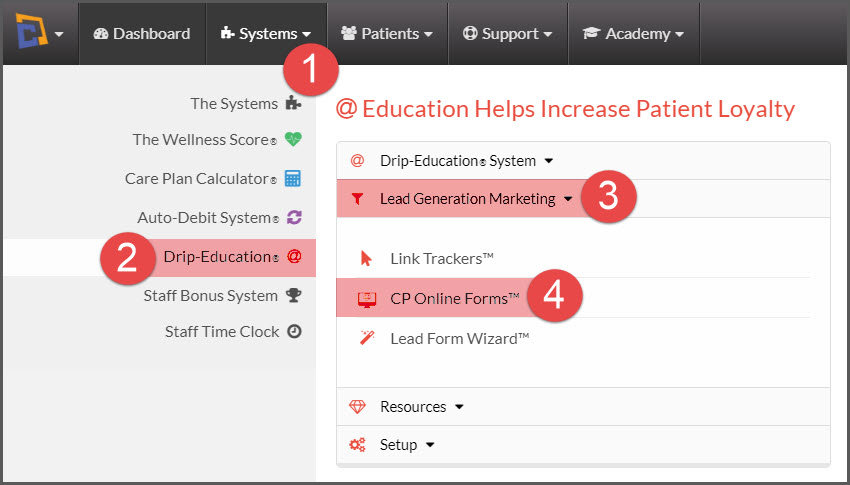
Step A: Go to the [Systems] menu→ [Drip-Education®] menu → click on [Lead Generation Marketing] →[CP Online Forms™].
Step B: Click on the [+Add New CP Online Form™] button, then click [OK] to confirm adding the form.

Step C: The page will reload with a new form that now needs to be customized. Click on the [Edit Form] button to start customizing the form.

Step D: Customize the form
Step 1: Form Settings
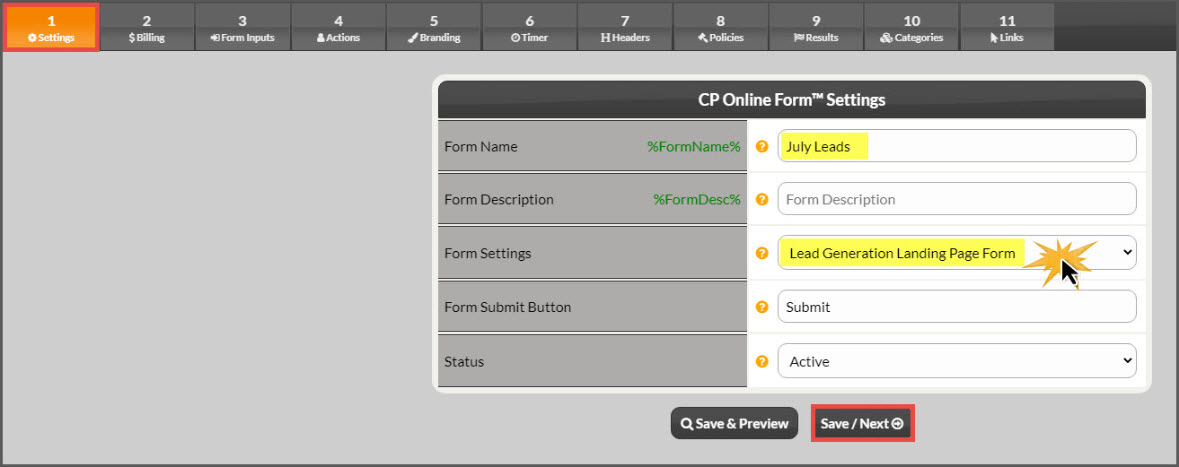
- Form Name: You can create your own Custom Form Inputs to capture additional data. To create Custom Fields click the [Custom Fields] button. Form Name: Enter a name for the CP Online Form™ using characters A-Z, a-z, 0-9. Choose a name that identifies the CP Online Form™ so it can be easily found when you have a large list of forms.
- Form Description: Enter a description for the CP Online Form™. What you enter here will be displayed on the CP Online Form™ and Email Receipt as well as substituted for the Drip-Ed™ Variable %FormDesc%. Ex: Monthly Website Membership. If left blank, no description will be displayed.
- Form Settings:
- Form Type:
- Lead Generation Landing Page Form: Select to create Landing Pages. Using the Drip-Education System to assign email campaigns makes this a powerful tool for generating leads online.
-
Static Display Landing Page: No information is collected at all. Use this choice to display the page only. Great if you want to create a custom thank you page.
- Form Submit Button: Enter what you want the CP Online Form™ Submit button to say. For example, 'Subscribe Now' or 'Click To Pay'.
- Status:
- Active: Turns ON the CP Online Form™.
- Inactive: Turns OFF the CP Online Form™. If you try to access the CP Online Form™ while it's Inactive, you will be redirected to an error page.
Select [Save/Next] 2x
Step 2: Form Inputs

Form inputs allow you to select what information is collected when processing the online form. Select your form Inputs from the list of standard inputs and custom inputs.
- Not Included - Input will not be included in the CP Online Form™.
- Included - Input will be included on the CP Online Form™ and will be Optional.
- Required - Input will be included in the CP Online Form™ and Required.
Click [Save/Next]
Step 3: Actions
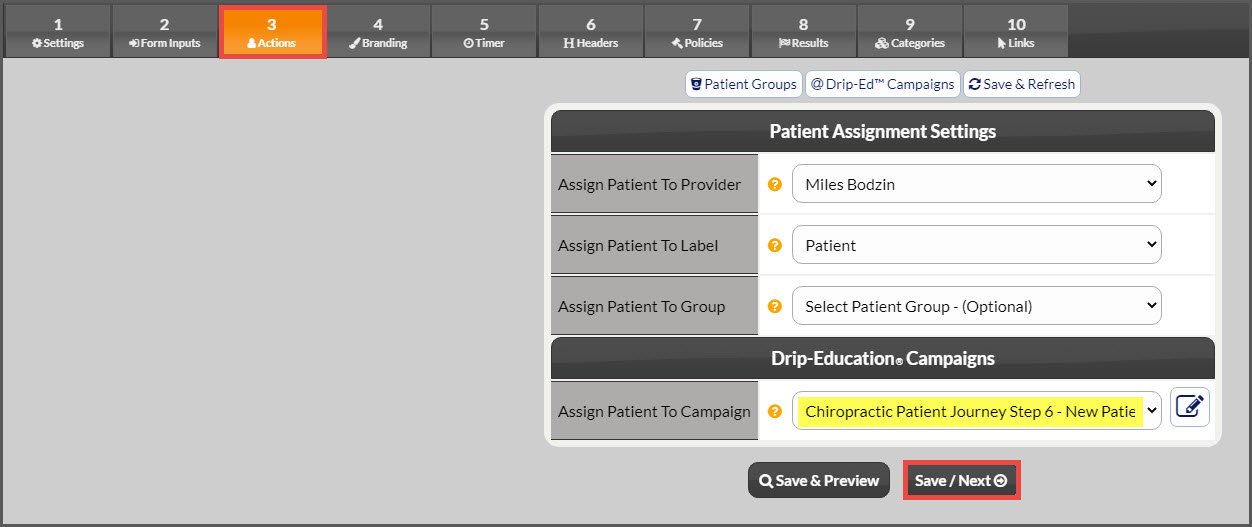
Patient Assignment Settings
- Assign Patient To Provider: You can create your own Custom From Inputs to capture additional data. To create Custom Fields click the [Custom Fields] button. Select the Provider you want the customer assigned too. If you select an associate Provider to assign the customer to, their account must remain active for the CP Online Form™ to function.
- Assign Patient To Label: Select the Label you want to be assigned to the customer if the transaction is successful.
- Assign Patient To Group: Select the Group you want the patient assigned to if the transaction is successful. This is optional.
Drip-Education® Campaigns
- Assign Patient To Campaign: Select the Drip-Ed™ Campaign you want to be assigned to the customer if the transaction is successful. This is optional.
Select [Save/Next]
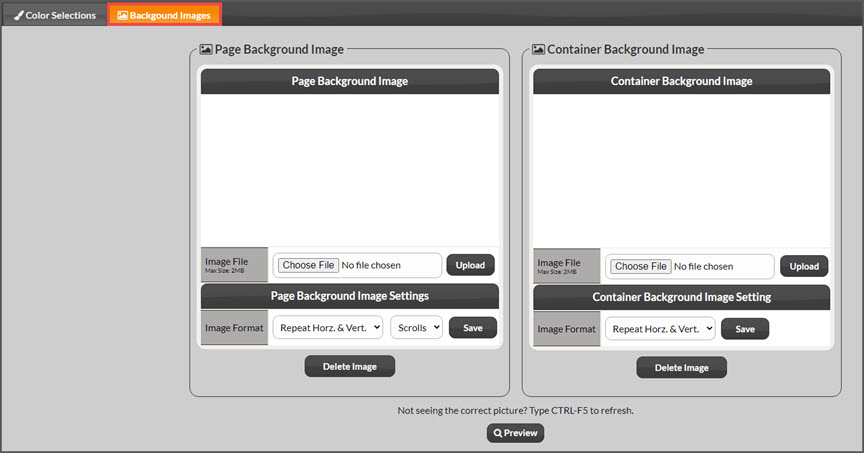
Step 4: Branding

- Color Selections: The form comes defaulted with a generic color scheme, choose to customize any part of the form colors or leave as-is.
- Background Images: You have the option to upload your own background or container image. Choose the file and select the correct settings.
Step 5: Timer
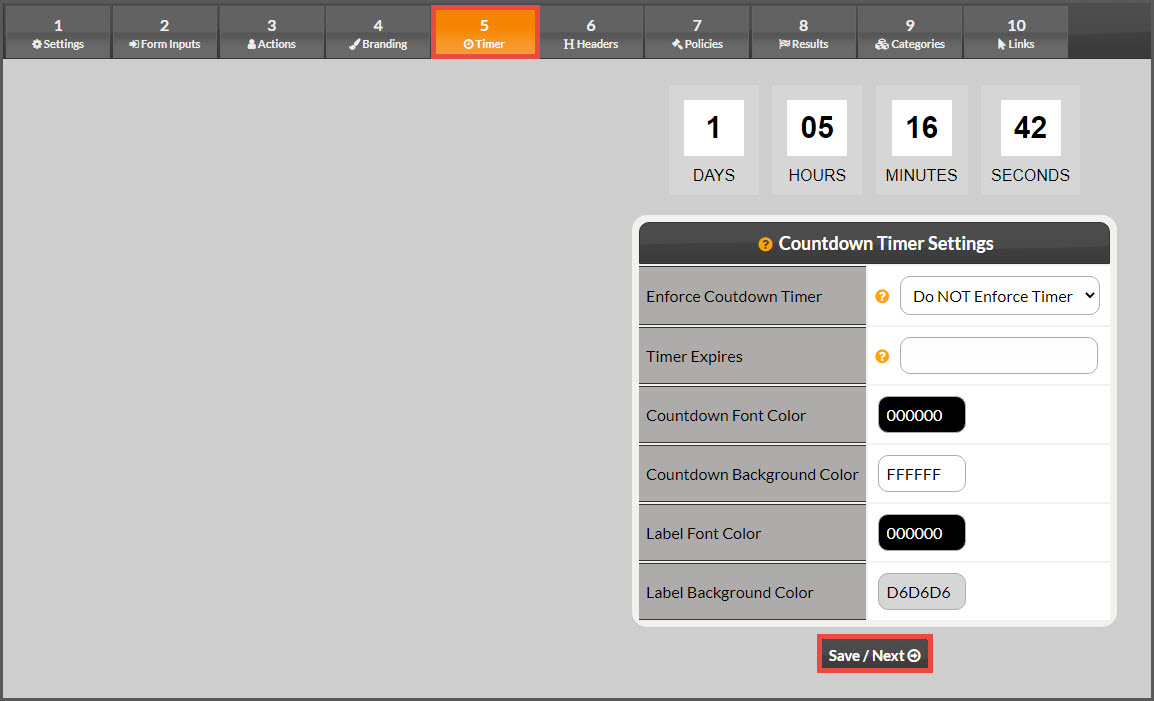
- Set the Timer Expires date and time.
- Customize the colors of the timer or leave as-is.
- You will use the %CountDownTimer% variable created in step 6 and insert the %CountDownTimer% variable into the header of your form on Step 6.
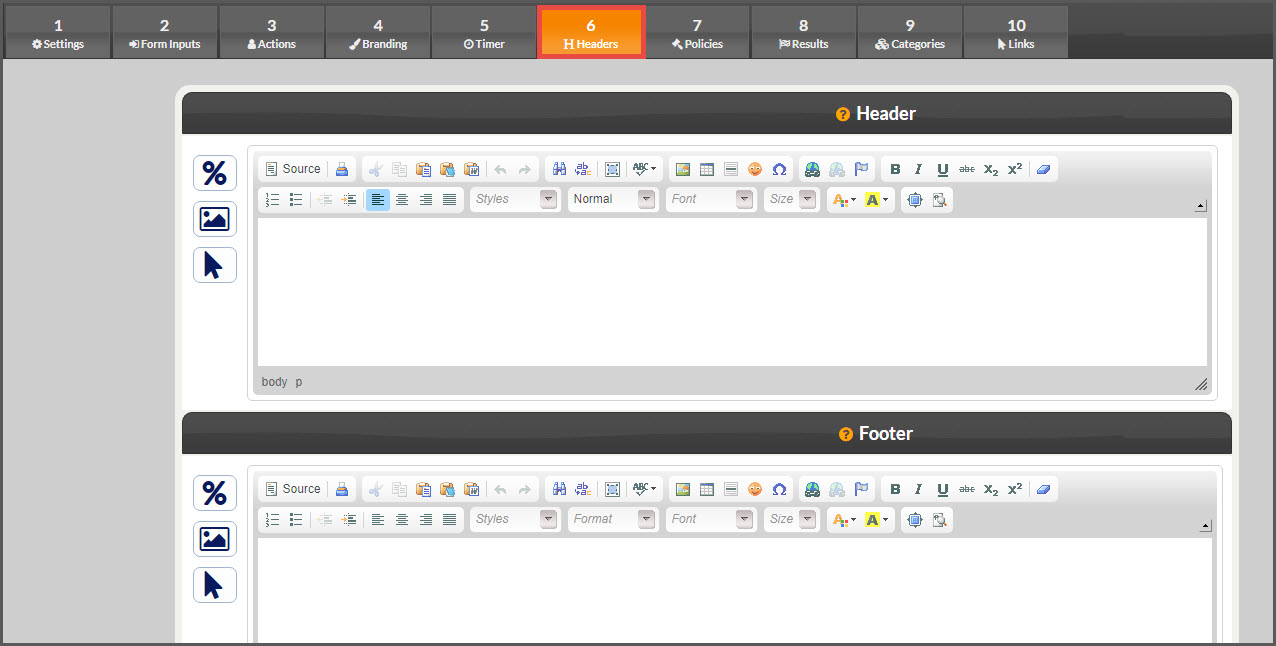
- Header: The CP Online Form™ Header can be customized with whatever info you want. This is where you may give instructions, descriptions, thank yous, etc. so the customer knows what they should do.
- For the most professional look, it is suggested that you create a Header Image File (png, gif or jpg) and upload it using the Insert/Edit Image button in the editor. Using the same header image on both the CP Online Form™ Receipt and Header is a good technique for a professional look. If you leave it blank, no header will be displayed.
- Footer: The CP Online Form™ Footer can be customized with whatever info you want. The footer is typically where you would place your company guarantees, return/cancellation policies, etc.
- If you do use a link, be sure to instruct the link to open in a new window so the customer does not leave the form when they click it. Like the header, you can use an image file or leave it blank.
Step 7: Policies

- Privacy Policy: The CP Online Form™ Privacy Policy is where you indicate your company's Privacy Policy. The link Privacy Policy will be placed at the bottom of the CP Online Forms™ and will open a pop-up window. Here, enter your policies, or at a minimum, use the pre-loaded content and delete the text in red font confirming you've read and agreed.
Click [Save/Next]
Step 8: Results
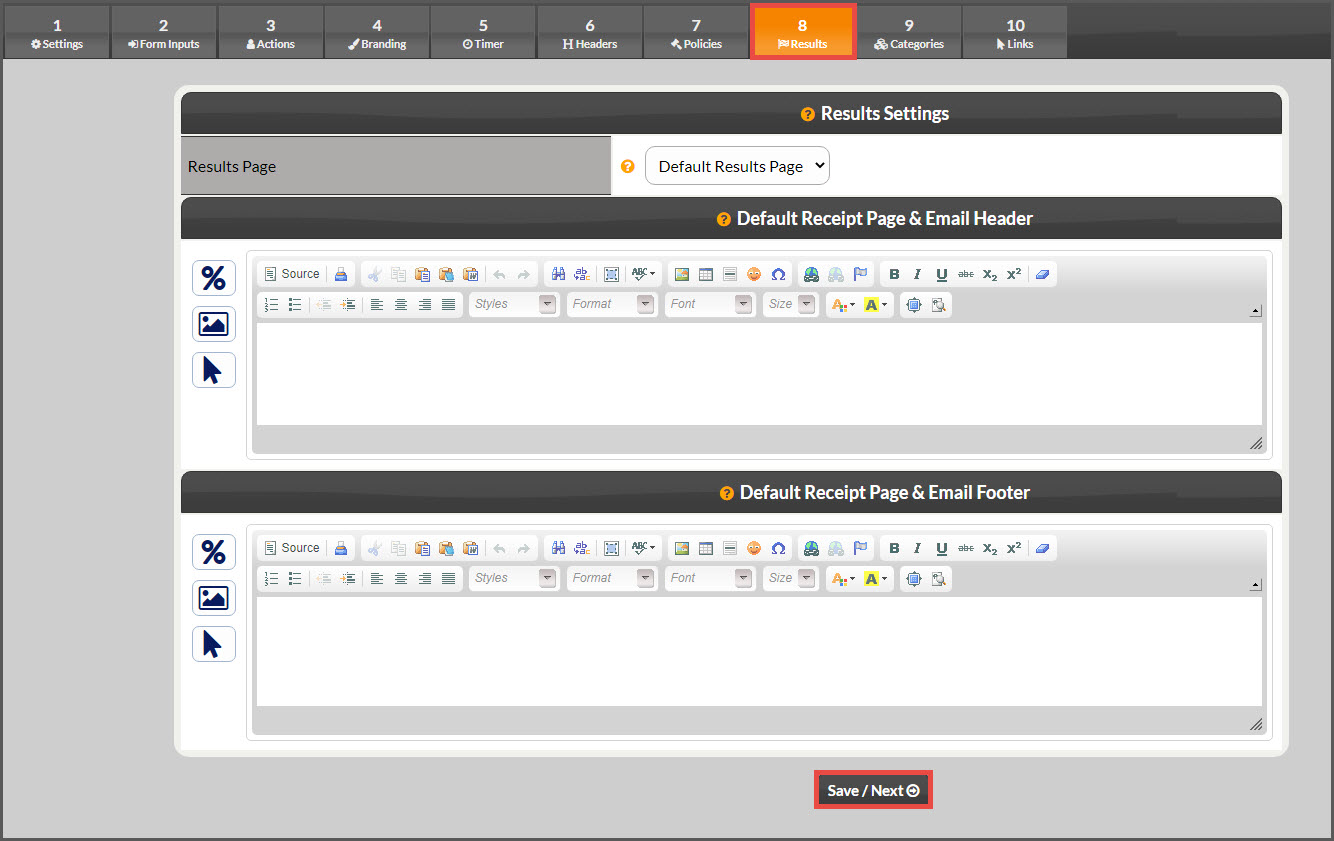
Once the customer submits the CP Online Form™, it will return a result. In most circumstances you want the customer to be redirected to a "receipt" or "thank you" page. However, you may have the need to redirect the results to your own page/script. For example, if you have a script that creates a new member account on your own website, you would want to redirect to that URL.
Besides sending the customer to a results page, the CP Online Form™ can email them a receipt. Use the two editors below to customize both the Default Receipt Page and the Email Receipt Header and Footer.
- Default Receipt - Once a customer submits the form, they will be redirected to the Default Receipt Page.
- Custom Results Page - Select this option if you need to redirect a customer to another page or script. Enter the CP Online Form™ Custom Results URL. If you are using a custom URL, you will need to download the Auto-Debit System® API Manual for a list of result variables that can be passed to the custom URL. If you are not sure what to do, leave by DEFAULT.
Select [Save/Next]
Step 10: Assigned Categories:

Use the Categories to organize your Online forms, Drip-Ed Campaigns™ and Link Trackers™
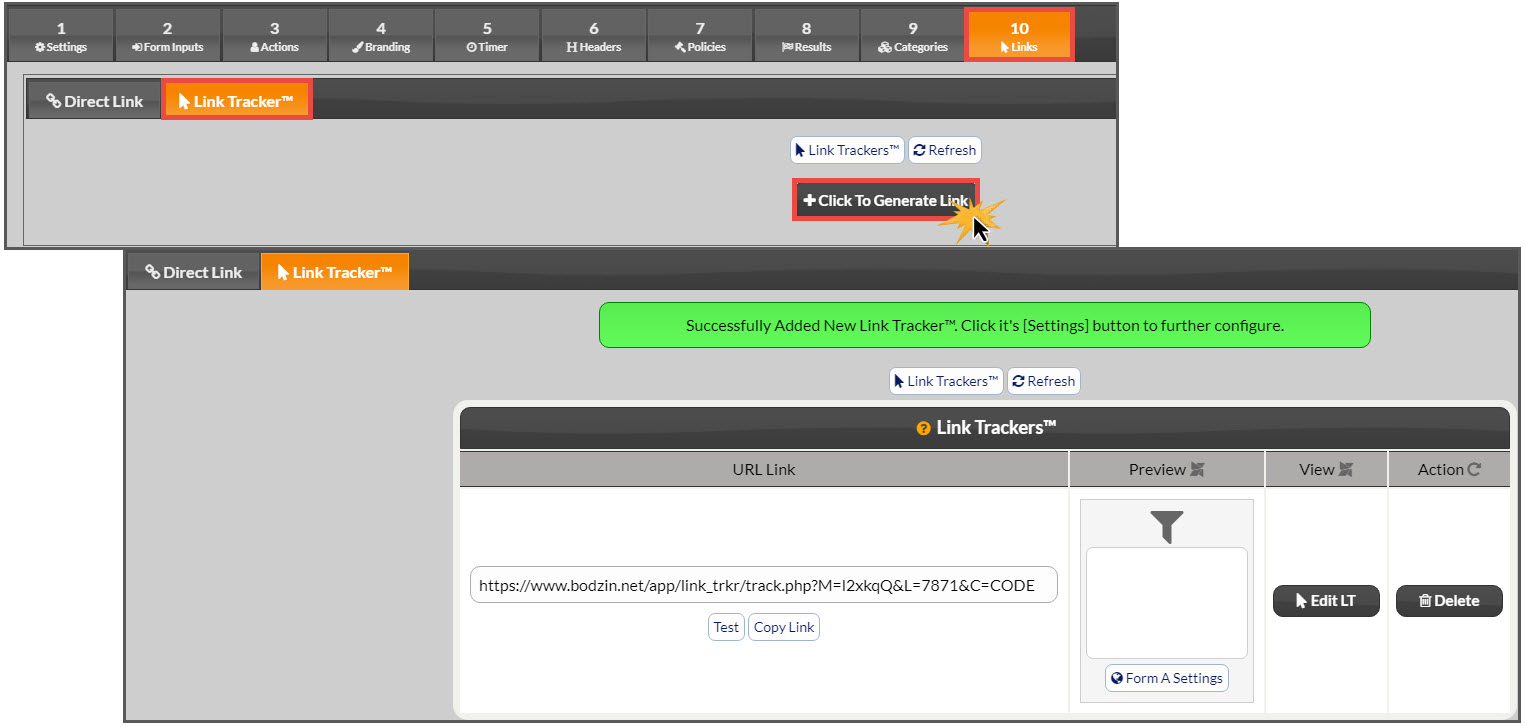
Step 11: Links
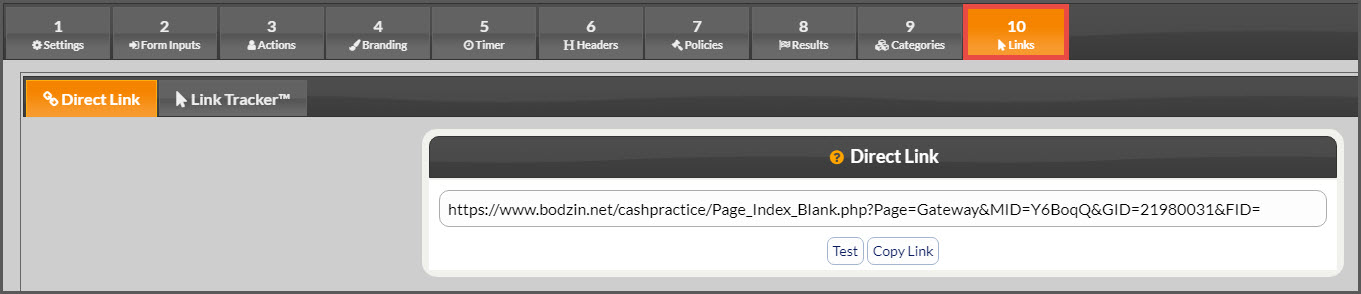
- Direct Link: This is the link to this CP Online Form™. You can click it to open the CP Online Form™ in a new browser tab. In the URL, the FID can be changed to any 3-Digit code. This is used to identify where you place the link. For example, if you place the link on your website, on Facebook, and on google ads, use a unique 3-digit code for each so you can see where the link was clicked when looking at your stats.
- Link tracker: The Drip-Ed Link Trackers™ allow you to better track your stats. By assigning this CP Online Form™ to a Drip-Ed Link Tracker™ you will be able to see who clicks the links and more. Then use its Drip-Ed™ Variable in your email campaigns as links to the form.
- To generate tracker access the [+ Click to Generate Link] button.